
Monday, April 25, 2016

Chickens, Chickens, Chickens

This year we decided to take on chickens. It has been one of the funnest and most rewarding experiences. I really do love my little chickens, even if they're not so little any more!


I bought my chickens 3 different ways. I picked up a couple of unsexed bantams at our local Tractor supply store, picked some up from a local breeder, and split a batch that my sister ordered and had delivered via the US Postal Service. I'm sure every post office is different, but that was definitely my least favorite way. We got all kinds of conflicting information from the post office from "we don't do chickens", to "we don't hold them, we just deliver them per usual with the rest of the mail", to "they're here please come pick them up." For us, it was a matter of talking to the right person, which seemed odd. We can't have been the first ones to order chickens! Also, I think the journey was a little hard on the sweet little chicks. Thankfully all of them made it alive and stayed alive.

Of the three ways, I would definitely recommend meeting up with a local breeder. Although, I will say my experience with the Tractor Supply sales staff was excellent! As with beekeepers it's always easy to find chicken owners who are willing to share helpful hints and tricks. I lucked out at the Tractor Supply Store and found a lady who happened to keep a flock of her own. She gave me all kinds of helpful information and even helped me collect all of my supplies and answered any questions I had with enthusiasm and personal experience. Most of the chicks were either unsexed or in a container with other breeds so as a novice it was hard to pick out the variety I was looking for with any certainty. It was also hit or miss. They weren't exactly sure which breeds they were getting and when they were getting them. They got new shipments in every week, so it was more like a stop by and see thing. I've since done a lot of research about which traits are considered good and bad within the breeds that I have purchased. If I could go back, I would have done that research first and been a bit more knowledgable when picking my chicks out, instead of going with the cute factor. Overall I'm pretty happy with what I have. I enjoyed the relaxed atmosphere of going to a local breeder. The one I went to had her chicks clearly labeled, sexed, and separated. I also had a choice of age, anywhere from newborn to 6 weeks old, with the older ones being more pricey. I wanted to raise mine from chicks and have the opportunity to bond with them so I went with the newborns. Another advantage of going with a local breeder was that the chicks seemed a bit healthier and less stressed than the mail ordered chicks. Baby chicks will get something called "Pasty Butt". Pasting up is a condition caused when the chick's droppings stick to the down around it's vent. The dropping can cause a build up forming a blockage which can be fatal to the chick. It's usually caused by stress to the chick in shipping, being to hot, too cold, or improper diet. They have to be watched carefully the first few days or they can literally die from this condition. If you notice a blockage starting to form you need to gently clean the blocked up area. Never pull on it to get it off. Soften it with warm water and gently rub it off with a washcloth or tooth brush. Some people will just let warm water run over their chicks behind while washing it off. I preferred letting them soak in a bowl full of warm water just high enough to cover their vent. I also kept my chick separated with food and water near the heat lamp until it was dry and watched it closely. Chicks will peck at anything that looks different in any way!

Baby Chicks require a few supplies:

Brooder
Litter
Waterer
Feeder
Chick Starter
Heat Lamp
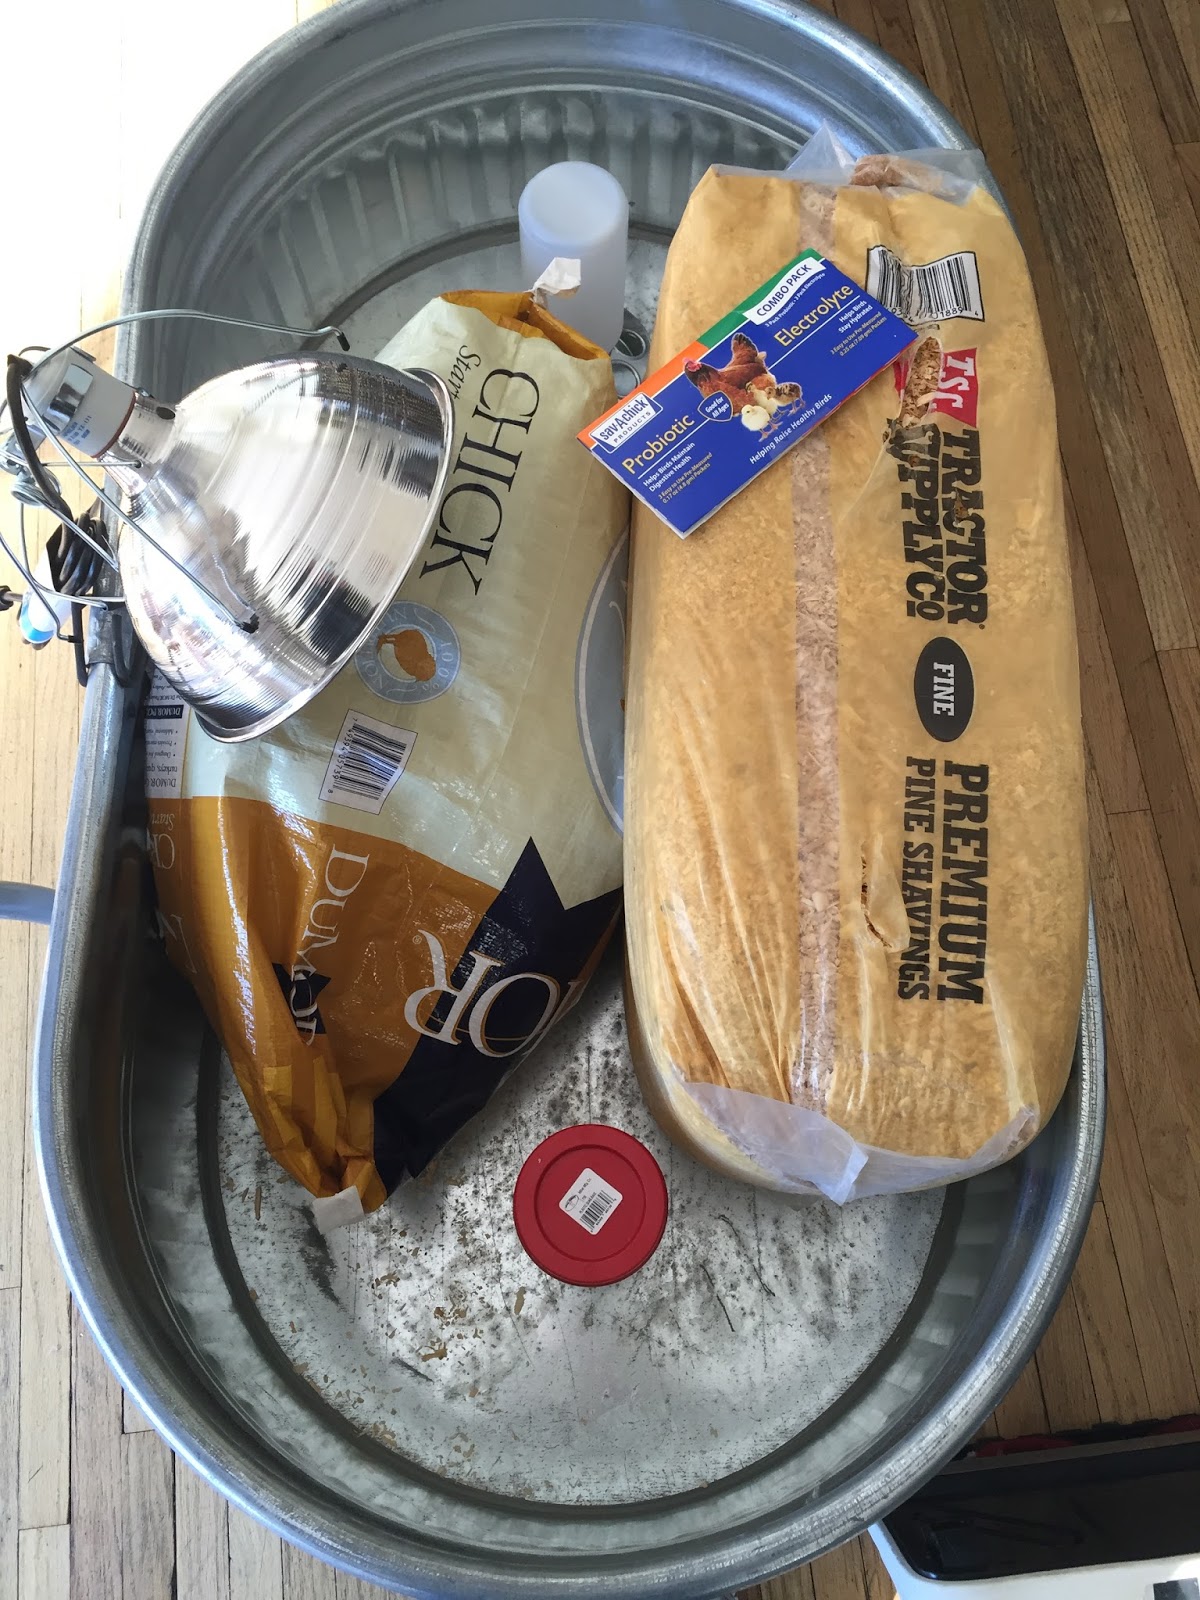


Extras include probiotics and electrolytes for a good start or you can simply add a little sugar to their waterer. 

Brooders can be made out of just about anything. I have a neighbor lady who kept a few chicks in a cardboard box lined with paper towels. The advantage being that you can simply throw it out when you are done with it. I knew that I wanted to invest and have this be a long term project so I bought a big metal trough from the tractor supply store. Your chicks will grow amazingly fast in a very short time and be hopping over your brooder walls so make sure you have your next step figured out before you get your chicks. They don't last long in the brooder!

A good brooder should have several features. It should:

have adequate space
protect from outdoor predators or indoor pets
have good ventilation
have a reliable heat source
freedom from drafts
protection from moisture

We happen to have a lovely cat


Letting your cat watch you open the chicks lets him know that they are yours. I followed all the rules, made my introductions, but I still wasn't going to trust the cat even though he has a very friendly temperament. I was lucky to have an imaginative son who helped me create a top for my brooder.

Here Harrison is constructing our lid. I told him what I wanted it to do and he came up with the materials and design.


The cat was definitely interested.


A chick has very little way of protecting itself from the cold. It was still very cold when we got our chicks with snow still on the ground so I gave them several weeks in our house in my little girl's room.  She is a chick master with just about no fear at all :-)


There are also lots of options for the litter. My very favorite is pine shavings for several reasons. When your chicks are little the fine shavings work best. When they get a little bigger you can go with the regular sized shavings. Pine shavings work best for me because they are fairly absorbent. Paper towels, newspaper etc tend to be extremely messy and require frequent cleaning. Pine shavings also have a wonderful smell. It won't take those chicks long to funk it up, but it's nice while it lasts. You should completely clean out your brooder at least once a week, although for me it was more like every 5 days. After that I couldn't take the smell. Cleaning it out includes dumping all of the litter and waste, washing it out with some dish soap, and starting out with at least 2 inches of fresh litter.  As far as the in-between time, I added a fresh layer of pine flakes every morning and sometimes at night. If your waterer has leaked at all you will need to get rid of any wet bedding.

Waterers can be the most annoying thing about having chicks. You will most likely end up buying at least two sizes. The big ones are too big for baby chicks. A chick could easily drown in one. In fact they are constantly falling asleep with their faces planted in their feeders. It is quite funny! But, the small ones won't last long at all. The chicks will outgrow their little waterers rather quickly. Both the little waterers and the big waterers will need to be refreshed daily and cleaned out with dish soap at least once a week. The little ones tend to get clogged up rather quickly with bedding so it is extremely important to check on them frequently. The little waterers sometimes need to be refreshed several times a day. I would recommend checking on them hourly for the first couple of days until you get a feel for their patterns of behavior and needs.  Here is an image of the waterer and feeder that I used in the beginning. Once your chicks move to a bigger waterer you can solve a lot of the clutter in the water by placing it on a stand of some sort. I used a large paver stone that was about 3 inches high, and then moved up to a stump several inches taller once my chicks got a bit bigger. The important thing is to make sure your chicks can get to their water. Your water will still need to be refreshed daily, but at least you can count on them having clean water for a whole day! Another problem I had with the little waterer which seems to not be unique to me is that if I didn't get it on just so it would leak. This caused two problems: one it saturated the bedding nearest to it and two, the chicks went thirsty. I could tell they were because when I realized what had happened I brought them fresh water and they all came running to guzzle down some water.


Feeders come in all kinds of varieties. The small one in this pic with the holes worked great for me. As with the waterers you will most likely need to buy two sizes, one for when they are just chicks, and one for when they get a little bigger. Both the waterers and the feeders will be labeled with how many chicks they can reasonably accommodate. Having two of each is also recommended so that chicks low on the pecking order have a place to get a drink or eat. As with the waterer your feeder should be thoroughly cleaned out about once a week.

It's also important to buy the correct feed. Laying hens can be given chick starter in a pinch, but chicks should never be given layer ration. There is an overload of calcium in layer ration that could cause serious problems for your chickens later. Every bag of feed will be labeled with what it's for and the appropriate age category.

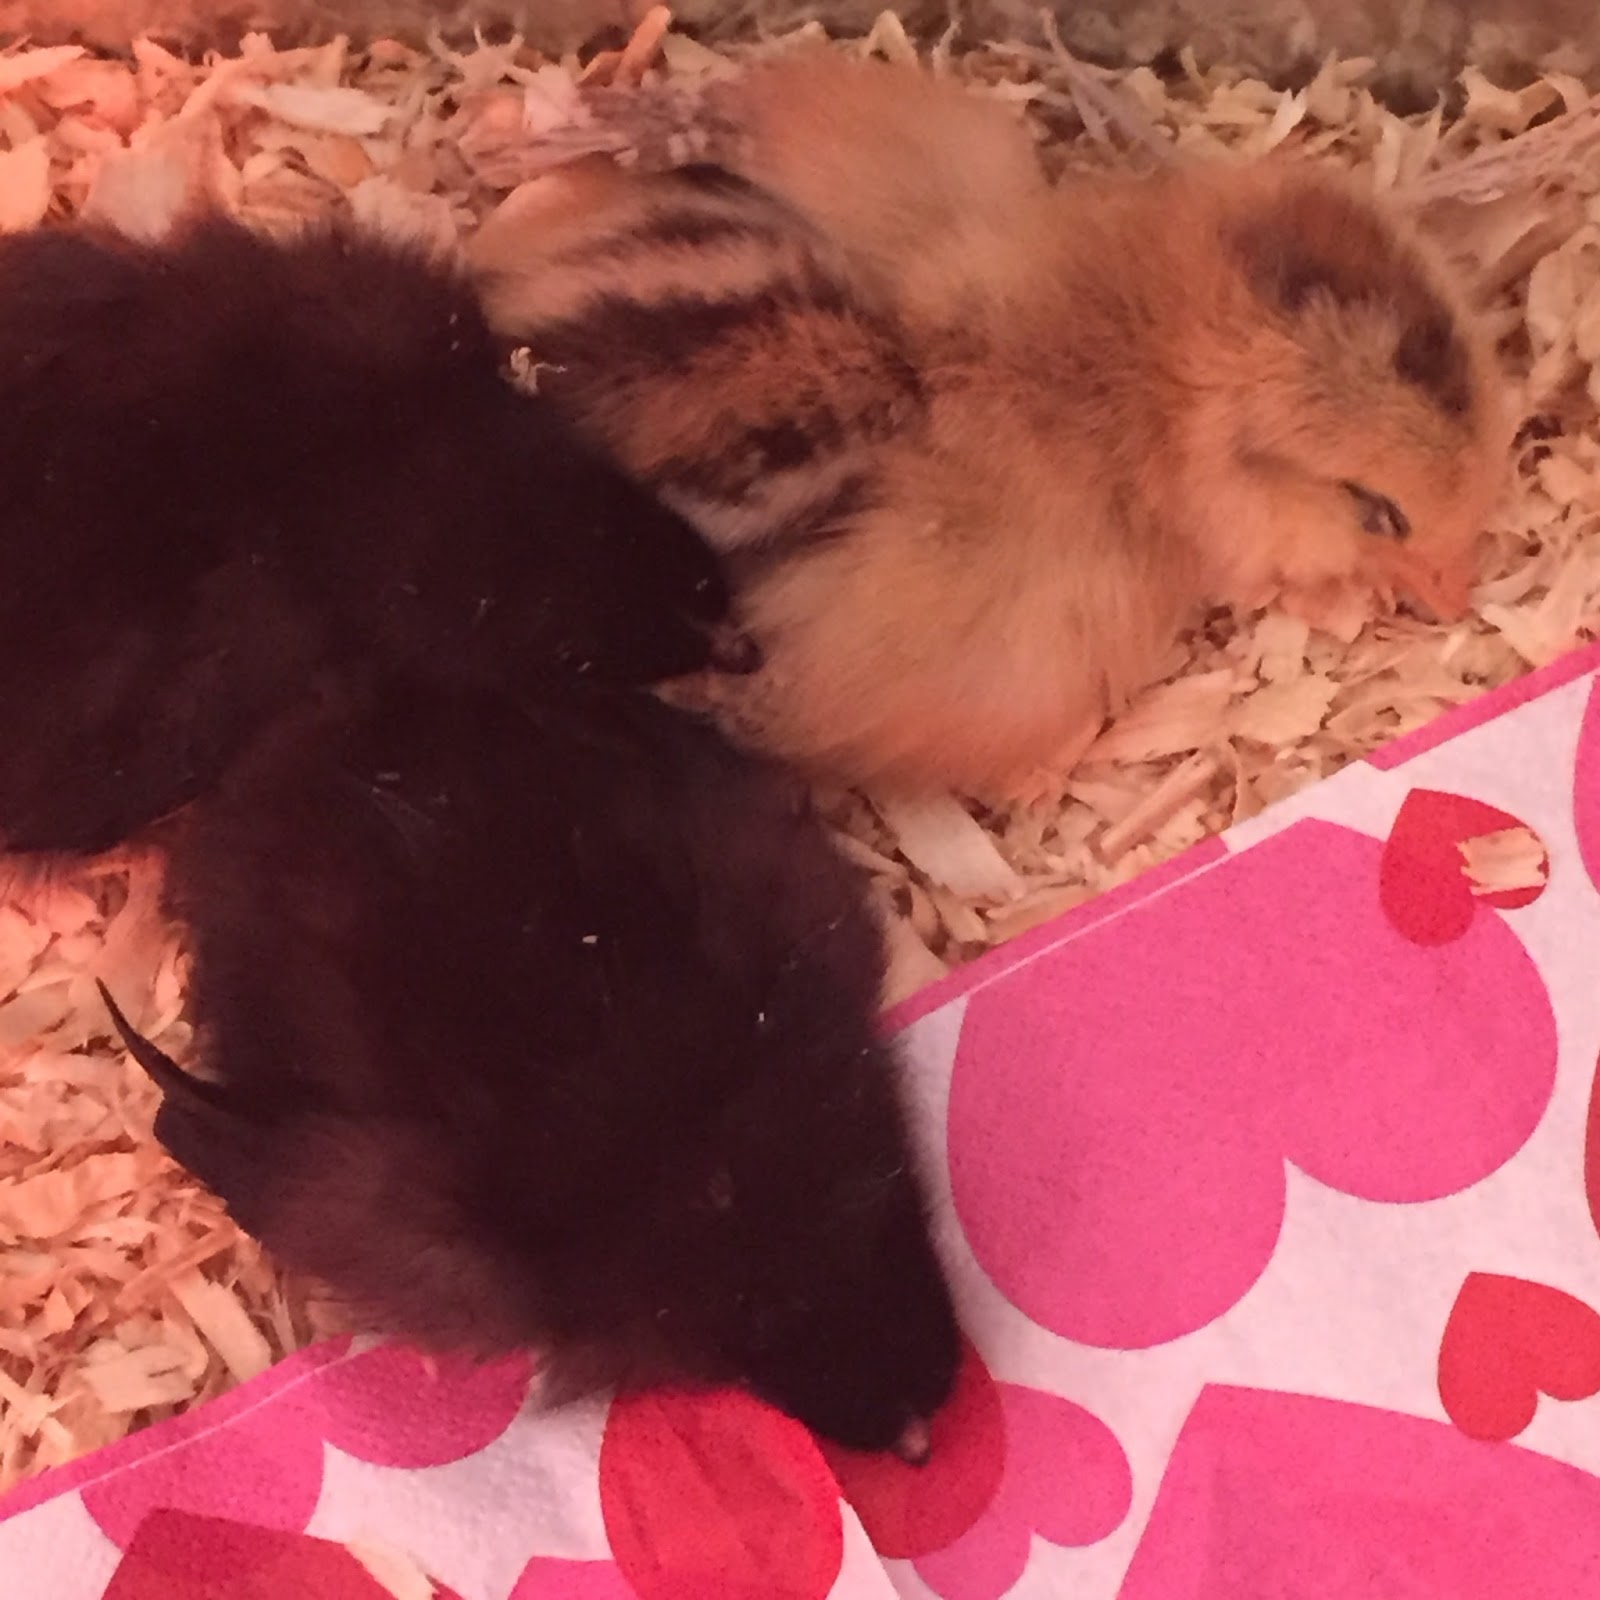
Heat lamps are a must, but be careful! The brooder temperature should be 95 degrees F for the first week of life. Heat lamps with a red bulb are best. They discourage the chicks from pecking each other. Chicks will peck at anything that looks even slightly out of the ordinary, but especially red. The idea with the red bulb is that it makes everything look red. The temperature can be dropped 5 degrees F each week until the brooder reaches ambient temperature. The chicks must be able get away from the heat lamp if they are too hot. They can die if they get overheated. Also, it's not a good idea to keep the feed or water too close to the heat lamp. If the chicks are all huddled together shivering under the heat lamp your brooder is probably not warm enough. Conversely if they are all huddled at the furthest corner away from the heat lamp it is probably too hot. You should see them freely walking around, not too clustered, with some of them enjoying the heat of the lamp, some of them scratching around and some of them at the waterer and feeder station. The one exception I noticed to this was at night when they were all sleeping. They'd form little rows and dog piles of happy sleeping chicks, one of my favorite sights!


First Things First

The very first thing you do when you get your chicks is to dip their beaks in water. Whether they come in the mail or from the store the most important thing is that they know where their waterer is. They will die without it, and in the case of mail order chicks they've been about as long as they can without it already. Watch carefully and make sure that all of your chicks are drinking and eating. Here they are a bit bigger.


It's so fun to watch their feathers come in. Some of them will look quite straggly and you may be temped to think something is wrong, but they're fine. They just look a little weird for a while. After about 20 days they should get their feathers in and will be capable of maintaing their body heat.

Mine loved going on walks and scavenging for treats when the weather was nice enough. Be prepared for them to run straight to a tree line or row of bushes. They don't especially like being out in the open at first. Mine made a B-line straight for the bushes where I watched them eat spiders and worms and all kinds of tasty bugs.


One of Livy's favorite things to do was dig up some worms for them and watch them play keep away with them. It's called food running and it's super fun to watch.


They are so much bigger now. They love being outside, dust bathing, and scratching for bugs. They will eat just about anything! But avoid giving them uncooked potato skins or avocados. These can be poisonous to a chicken. The happiest I ever saw them was after I had given them the rinds of watermelon I had cut up for a snack for my kids. I love Twofors!


Here they finish off a bit of yogurt I was snacking on. It was a little messy, but they couldn't get enough!


They are still getting used to being outside so every time a truck passes by or a dog barks they go running. They have a favorite corner of the back yard behind the garage that they run and huddle to.  They sure do keep me entertained.


I enjoy letting them free range while I am outside with them. They always have access to feed and water, but letting them scratch for bugs and eat grass cuts down on the amount of feed they go through. It's also so much better for them and the eggs they will be laying!

Tuesday, February 23, 2016

Ooh La La Chocolate Macaroons

I found this recipe on Chowhound. It's the best recipe for Macaroons I've tried yet. When Chad tried them he said they were like brownies on crack :-) I wasn't  perfectly satisfied with the Ganache filling so I added 1/4 Cup of powdered sugar, but here is the recipe in it's original form.


Ingredients:

  • 2 cups powdered sugar
  • 1 cup almond flour or almond meal
  • 3 tablespoons natural unsweetened cocoa powder
  • 1/4 teaspoon fine salt
  • 3 large egg whites, at room temperature
  • Pinch cream of tartar
  • 3 tablespoons granulated sugar

Ganache Filling:

  • 4 ounces bittersweet chocolate, finely chopped
  • 1/2 cup heavy cream
  • 2 tablespoons unsalted butter (1/4 stick), at room temperature and cut into cubes

For the macarons:
  1. 1Line two baking sheets with parchment paper; set aside. Fit a large pastry bag with a 1/2-inch plain tip; set aside.
  2. 2Place the powdered sugar, almond flour, cocoa powder, and salt in a food processor fitted with a blade attachment and pulse several times to aerate. Process until fine and combined, about 30 seconds. Sift through a flour sifter into a large bowl; set aside.
  3. 3Make a meringue by placing the egg whites in the clean bowl of a stand mixer fitted with a whisk attachment. Beat on medium speed until opaque and foamy, about 30 seconds. Add the cream of tartar, increase the speed to medium high, and beat until the egg whites are white in color and hold the line of the whisk, about 1 minute. Continue to beat, slowly adding the granulated sugar, until the sugar is combined, the peaks are stiff, and the whites are shiny, about 1 minute more. (Do not overwhip.) Transfer the meringue to a large bowl.
  4. 4Using a rubber spatula, gently fold the dry mixture into the egg whites in four batches until the dry ingredients are just combined. (The meringue will deflate.)With the final addition, stop folding when there are no traces of egg whites, the mixture runs like slow-moving lava, and it looks like cake batter. (Do not overmix.) 
  1. 5Transfer the batter to the pastry bag. Pipe out 1-1/4-inch rounds about 1 inch apart onto the baking sheets, about 25 per sheet. Pick up the baking sheets and bang them against the work surface to help create the macaroon base, or foot. Let the rounds sit at room temperature for 30 minutes to dry the tops and ensure even cooking. ( For this part I tried both ways, but I preferred using my tiny cookie scoop. I felt like I did a better job of getting uniform shapes and had more control.) 

  1. 6Heat the oven to 350°F and arrange a rack in the middle. Bake the macaroons one sheet at a time for 7 minutes. Rotate the sheet and cook for 7 minutes more. Transfer the sheet to a rack to cool completely.
For the ganache filling:
  1. 1Place the chopped chocolate in a large bowl.
  2. 2Warm the cream in a small saucepan over medium heat until it just starts to boil. Stir it into the chocolate without creating bubbles. Let sit for 1 minute. Add the butter and stir until smooth. Chill in the refrigerator until thickened but still spreadable, about 30 minutes.
To assemble:

Match up macaroons of a similar size. You can either pipe the ganache filling onto the macaroons or simply spread it with a butter knife. Squeeze or scoop the ganach to about the size of a cherry, about 1 teaspoon) onto the center of a macaroon half. Top with another half and press gently so that it looks like a mini hamburger. The filling should not ooze out the edges. Refrigerate, covered, at least 24 hours before serving. 

Enjoy! 

Saturday, January 30, 2016

Mixed Berry Macaroons

These Mixed Berry Macaroons are better than any store bought macaroon I have ever tried! I am simply in love!


Macaroon Ingredients:

1 1/4 cups of powdered sugar
2/3 cup almond flour
pinch of salt
2 egg whites
1/4 teaspoon of cream of tarter
1 Tablespoon of sugar
1/4 teaspoon vanilla
A small amount of food coloring

*SILPAT cookie sheet


1. Sift together powdered sugar, almond flour, and salt. Set aside.
2. Beat egg whites for about 30 seconds on medium speed until white and frothy.
3. Add in cream of tarter and beat for 60 seconds on high. The eggs should be white in color and hold the line of the whisk.
4. Continue to beat adding in the sugar, vanilla and food coloring for another 60 seconds until peaks are stiff and the whites are shiny. Do not whip for longer than 60 seconds.
5. Now fold in the almond flour mixture with a rubber spatula. About 30 strokes. You don't want to over mix otherwise the macaroons will not do what they are supposed to.
6. Most recipes call for filling an icing bag with the batter and squeezing out 1 1/2 inch rounds, but I prefer to use my tiny cookie scoop. The cookies end up being a lot more uniform in size and I feel like I have more control. Don't even try to get away with using parchment paper. *You have to use a SILPAT cookie sheet. It's the only way they'll ever come off! Here's about what they should look like.


The above are Chocolate Macaroons, stay tuned for the recipe! Otherwise you might end up in tears with something that looks like this! These were on of my first attempts. I didn't care for this recipe at all!


7. Thump them down a couple of times on the cookie sheet and let them sit for 30 minutes forming a hard skin on the top.
8. Preheat oven to 350 degrees.
9. Bake for 7 minutes then rotate your cookie sheet and bake for another 6-7 minutes.
10. Let them cool completely.
11. Add filling by either spooning a generous Tablespoon into the center of your cookie or piping it on in rounds. If you spoon it on, you can use the top to gently press the mass of filling out towards the edges.  Either way make sure not to handle the macaroon on the tops, they are very delicate and will smash in and not be as pretty. Handle the cookies by holding them on their sides.
12. Et Voila! Enjoy!


Filling Ingredients:

1 1/2 cups of mixed berries (I used Frozen)
2 Tablespoons of water
1/4 cup of butter + 1/2 cup of butter at room temperature
1/4 cup of powdered sugar + 1 cup of powdered sugar
2 teaspoons of fresh squeezed lemon juice


1. Heat water, berries, and 1/4 cup of powdered sugar to a boil. Cook until the fruit begins to break down.
2. Blend in a blender on high until smooth.
3. Strain using a sieve until all the seeds are eliminated. Set aside.
4. Whisk 1/2 cup of butter and 1 cup of powdered sugar until smooth.
5. Add lemon juice and SOME of the syrup to taste and consistency. You don't want your filling to be too runny, but you want the delicious flavor of the berries. So go SLOWLY and make sure you have a good consistency. Set aside the rest of the syrup to use as a garnish or as syrup for pancakes!

You may choose to drizzle a little of the berry syrup along the plates, it adds beauty and flavor!

Hope you enjoy!

I really enjoyed using the leftover syrup on our pancakes the next day :-) It brought back good memories of spending the night at one of my best friend's houses growing up. They made pancakes and fresh syrup every saturday and they always had about 4 different kinds. The berry syrup was my fav!


Tuesday, January 19, 2016

Favorite Oatmeal Cookies

This is a Brown Family Favorite!

Ingredients:

14 Tablespoons of butter, let them sit on the counter for about an hour before you use.
1 Cup of granulated sugar
1/4 cup packed light brown sugar
1 egg
1 teaspoon vanilla extract
1 teaspoon of cinnamon
1/2 teaspoon of salt
1/2 teaspoon of baking soda
3/4 teaspoon of baking powder
1 cup of all purpose flour
2 1/2 cups of old-fashioned rolled oats

Cream the butter and sugars for 30 seconds, scrape down the sides of the bowl and mix for another 30 seconds.
Add in the egg and mix for another 30 seconds. Scrape down the sides of the bowl.
Add in the vanilla, cinnamon, salt, baking soda, and baking powder and mix for 30 seconds. 
Add in the flour and mix for 1 minute. Scrape down the sides of the bowl.
Add in the oats 1/2 cup at a time until fully incorporated.

Bake at 350 degrees for 10-13 minutes until the edges are crispy and golden.


post signature

Monday, November 23, 2015

Dollar Store Sock Snowmen


These Dollar Store Sock Snowmen are so much fun to make and the kids love them! Use them as decorations or as christmas giveaways.

Here's what you need:
White socks from the dollar store ( I used the kids sizes, the adult sizes hold much more rice )
Rice (1 1/4 cup of rice for the smallest kid size 4-6 1/2, 2 cups for the next size up, 6-8 1/2.
White twine
Matching buttons
Fleece (for this you can either just buy scraps of fleece or use fleece scarves from the Dollar Store)
Patterned socks from the dollar store to use as hats
pins for the eyes and noses (blues, oranges, pinks)

Cut your socks like this.


Use the toe part of the sock to form the hat by rolling it over 2 times.


Nest inside out the rest of your sock and tie a knot with twine at the end.


Right side it out and stuff it with rice.


After you have filled it with rice use the twine again to tie off the top. Then use another piece of twine to separate the body of the snowman from its head.


Finish by adding the hat, buttons, pin eyes, and a fleece scarf.

This would totally make a cute gift to give for a family night! Here's one of the kits I created.


Hope you have fun! I sure did!


Homemade Caramel and Apples

There is nothing more frustrating or rewarding than some delicious homemade Caramel dipped apples. This is a recipe that one of my favorite cooks was kind enough to share with me! I love it! The white chocolate with the spices sprinkled over it is WONDERFUL! I forgot to take a pic :-(


Caramel Apples

1 pound brown sugar (2 1/4 cups)
1 cup butter (2 sticks)
1 can sweetened condensed milk
1 cup light corn syrup
1 1/2 tsp. vanilla
1/4 tsp. salt
20 small apples washed (can soak in a large bowl of water with ¼- ½ cup vinegar) and dried well
20 dowels or craft sticks pushed into the tops of the washed apples

Topping:
White chocolate for melting (I used almond bark) melted in double broiler or microwave.
3 T. sugar
1/2 tsp. cinnamon
1/4 tsp. apple pie spice


Combine First 6 ingredients in a 2-3 quart sauce pan.  Heat at medium low temp. stirring constantly but slowly and frequently scraping the bottom of the pan.  Cook caramel to the soft ball stage (236) degrees.  Pour into a small deep metal or heat proof bowl and let cool to 200 degrees.  Line a baking sheet with parchment paper.  (I just sprayed the baking sheet with Pam) While caramel cools you can prepare the topping.  


Dip apples into caramel using a straight up and down motion (I find it's necessary to tilt the bowl and twirl the apple in the caramel to get it covered fully and this seems to work fine too).  Place dipped apples on baking sheet and place in the fridge for 15 to 20 min.  Next drizzle desired amount of white chocolate on top of apples and then sprinkle with cinnamon sugar mixture.   I also like to individually wrap them in a cellophane bag and tie it up with ribbon/twine etc.) 

Yum!

I have also experimented with making one of my favorite types of candies: Scotch Kisses. These are incredible, although I've got to figure out how to perfect the process and the packaging. This was my first attempt.


I used a homemade marshmallow recipe and then poured the caramel over the cut marshmallows. I'm still trying to find the best marshmallow recipe, but it's worth the effort for sure! Delicious!

Wednesday, October 14, 2015

Mermaids, Pirates, and Baptisms

My little Olivia turned 8 recently and got baptized. One of my good friends did her baptism pictures. She is an amazing photographer! If you want to check her out here is a link to her website!

Here are a few of my very favorites! (I should add that Olivia is extremely difficult to photograph! Megan did an amazing job!) She also did color, but I'm a sucker for black and whites!


This one is absolutely beautiful in color! I want to order a canvas of this one!


And now for the Mermaid Party! Although my iPhone pics look TERRIBLE after this lot!


We had tons of fun! It was mostly family, but we did invite a few of the neighborhood kids. We had a Treasure Hunt, and made these cute mermaid necklaces and starfish hair clips.


The clam cupcakes  were made using vanilla wafers, a bit of turquoise icing and some sugar pearls. They were so super easy!


My older son also helped me fashion a few wooden swords for the boys and I picked up a few eye patches at Walmart. Mostly the kids just had fun hanging out and jumping on the tramp.


Happy Birthday my beautiful Olivia! Mommy loves you!