Making your own bunting is great fun! I enjoy being able to pull from the few strips of bunting that I have and dress any occasion up. This Halloween bunting was actually a "firsts" shower gift for a friend of mine.
Materials:
7 inch strip of 42 inch wide fabric (7X42)
7 inch strip of 42 inch wide fabric for backing
Enough 7 inch strips of interfacing to cover all of your triangles. This will depend on how wide your interfacing and how many triangles you want to use in your bunting. (I only used 7 for mine.)
Double folded bias tape
Matching thread
Opt: a piece of fabric and doubled sided interfacing 81/2 by 11 to create lettering.
To start cut a 7 in strip of fabric.
The next thing you will want to do is create your triangles. For this particular project I used 7 in triangles. Your strip is already 7 inches tall. To make your first cut mark the top of your fabric at 0 inches and 7 inches. Mark the bottom of your fabric at 3.5 inches. Now using your roller cutter and ruler cut from the top (0 in) to the bottom (3.5 in), and then again from the bottom (3.5 in) to the top at the 7 in mark.
Continue cutting following that pattern. The top should be marked at 0in, 7in, 14in, 21in, 28in, 35in, and 42in. The bottom should be marked at 3.5in, 10.5in, 17.5in, 24.5in, 31.5in and 38.5 inches. When you are through cutting you should have a total of 11 triangles (for 42in wide fabric).
After you are through cutting the tops of your bunting, repeat the process with the interfacing and the backs of your bunting.
Follow the manufacturers directions to adhere the front and backs to the double sided iron on interfacing.
After all of the triangles are complete use pinking sheers to cut along the sides of your triangles. Top stitch double folded bias tape along the top of your bunting sandwiching the triangles in between the layers of the bias tape.
If you want to add some lettering this is one way of doing it:
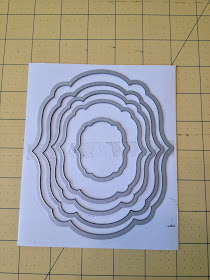
First I cut a piece of white fabric and some double sided interfacing to 81/2 by 11 inches (the same size as a standard sized piece of paper). I used a paper backed interfacing meant for applique. Then I adhered the sticky side of the interfacing to the white fabric and left the paper backing on. Next I ran my fabric through the printer and printed the letters for SPOOKY! out. I used this set of frames for my Stizzix to cut the letters out.
After I cut the letters out I pulled off the sticky back and ironed the letters onto the finished bunting.
Hope you found this tutorial helpful!
For other Halloween "Firsts" Click HERE


No comments:
Post a Comment