I'm totally a pinterest copycat! I saw these and wanted to make a few as Christmas gifts. They were so super simple and easy to make.
Materials:
White porcelain cup
Black sharpie
Cellophane baggie
Ribbon or twine, anything to tie your cellophane off with
Tag (I found my black chalk tags at Michaels for 39 cents)
Cocoa Mix (see here for recipe)
Marshmallows
be sure to include a recipe with instructions if you choose to use one.
After you have "sharpied" your design onto your cup place it in a cold oven and bake it on 350 degrees for 30 minutes. Let your cups cool completely. Hand Wash.
Hope you enjoy!
Friday, December 19, 2014
Sunday, November 16, 2014
Grandma's Delicious Rolls
This is a recipe perfected by my grandmother. They are affectionately known as Grandma's Rolls by all of her grandchildren and great grandchildren. My grandmother took the time to show me how to make her rolls while I was in college. The recipe is the same, but the method might be slightly changed. They are somewhere between a dinner roll and a sweet roll.
Recipe:
1 Cup milk
1/2 Cup butter
1/4 Cup warm water
1 TBS & 1 tsp yeast
1/2 Cup & 1 tsp sugar
2 eggs
1 tsp salt
4 Cups Flour
1. Heat your milk and butter in a sauce pan until the butter is just melted. Remove from heat and allow to cool somewhat.
2. Meanwhile, Place warm water, yeast, and 1 tsp sugar in a bowl.
3. Beat sugar, eggs, and salt in a mixer.
4. Mix in a 1/2 cup of the flour.
5. Poor in 1/2 of the milk and melted butter.
6. Mix in another 1/2 cup of the flour.
7. Poor in the remaining milk and butter and mix.
8. Add in the yeast mixture and stir.
9. Add the remaining 3 Cups of flour. Mix until just blended.
This is a very wet dough, no worries.
10. Cover with a towel and allow to rise for 1 hour.
11. Coat a glass baking dish with butter.
12. Coat your hands with butter. This is the only way to work with this dough without loosing your mind and making a very sticky mess.
13. Divide the dough into 12 dough balls, coating your hands with butter every three or so rolls.
14. Heat your oven to 350 degrees and let the rolls rise for 20 min.
15. Bake the rolls for 20 minutes or until they are a very nice dark golden brown.
16. Butter the tops of your rolls and allow them to cool for 10 minutes before removing them from the pan.
17. Enjoy, they are delicious!
Monday, October 20, 2014
Painted Pumpkins
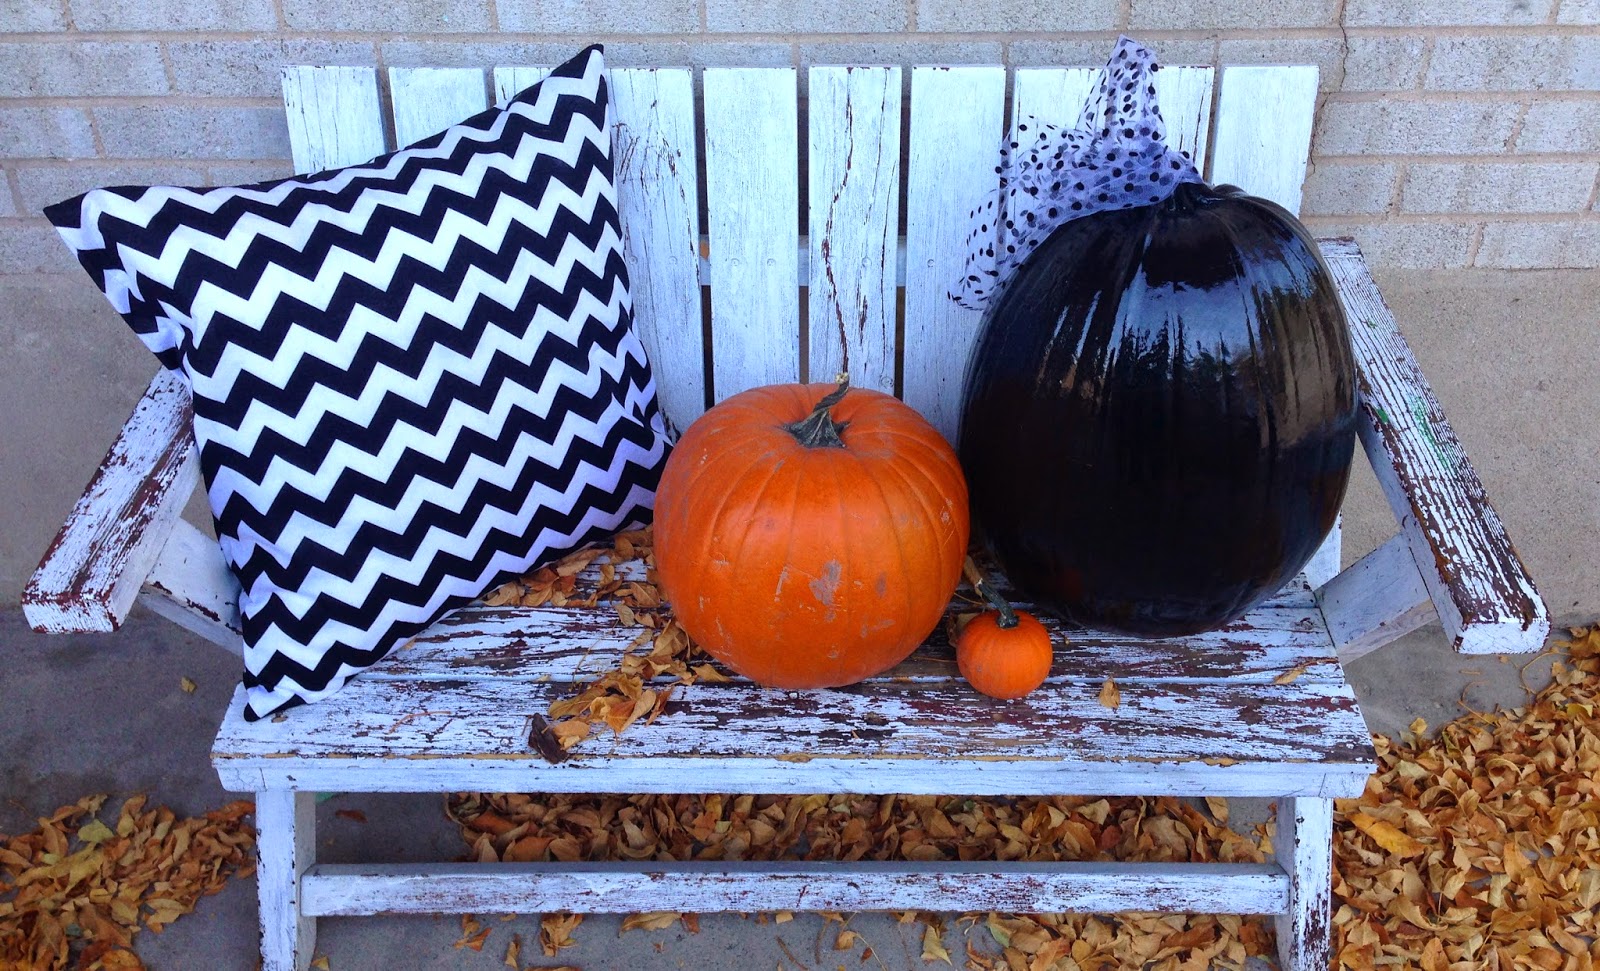
I'm having so much fun painting pumpkins!
I'm on the fence with the blue one right now, just trying to decide if I want to add a little turquoise to my fall decor, but either way it's tons of fun. I love the shiny black spray paint. I found it at Walmart for a mere 99 cents! It really looks spooky. The pumpkin warts are kind of fun too. It took 2-3 coats with about 10 minutes in between each coat to get a nice opaque look. I had to eye ball the stripes with some cheap acrylic paint and a paint brush. I tried taping it off with painter's tape, but it stripped the pumpkin of it's white base coat.
For an Easy Peasy Zipper Free Pillowcase how to CLICK HERE
I'm on the fence with the blue one right now, just trying to decide if I want to add a little turquoise to my fall decor, but either way it's tons of fun. I love the shiny black spray paint. I found it at Walmart for a mere 99 cents! It really looks spooky. The pumpkin warts are kind of fun too. It took 2-3 coats with about 10 minutes in between each coat to get a nice opaque look. I had to eye ball the stripes with some cheap acrylic paint and a paint brush. I tried taping it off with painter's tape, but it stripped the pumpkin of it's white base coat.
For an Easy Peasy Zipper Free Pillowcase how to CLICK HERE
Home Fries
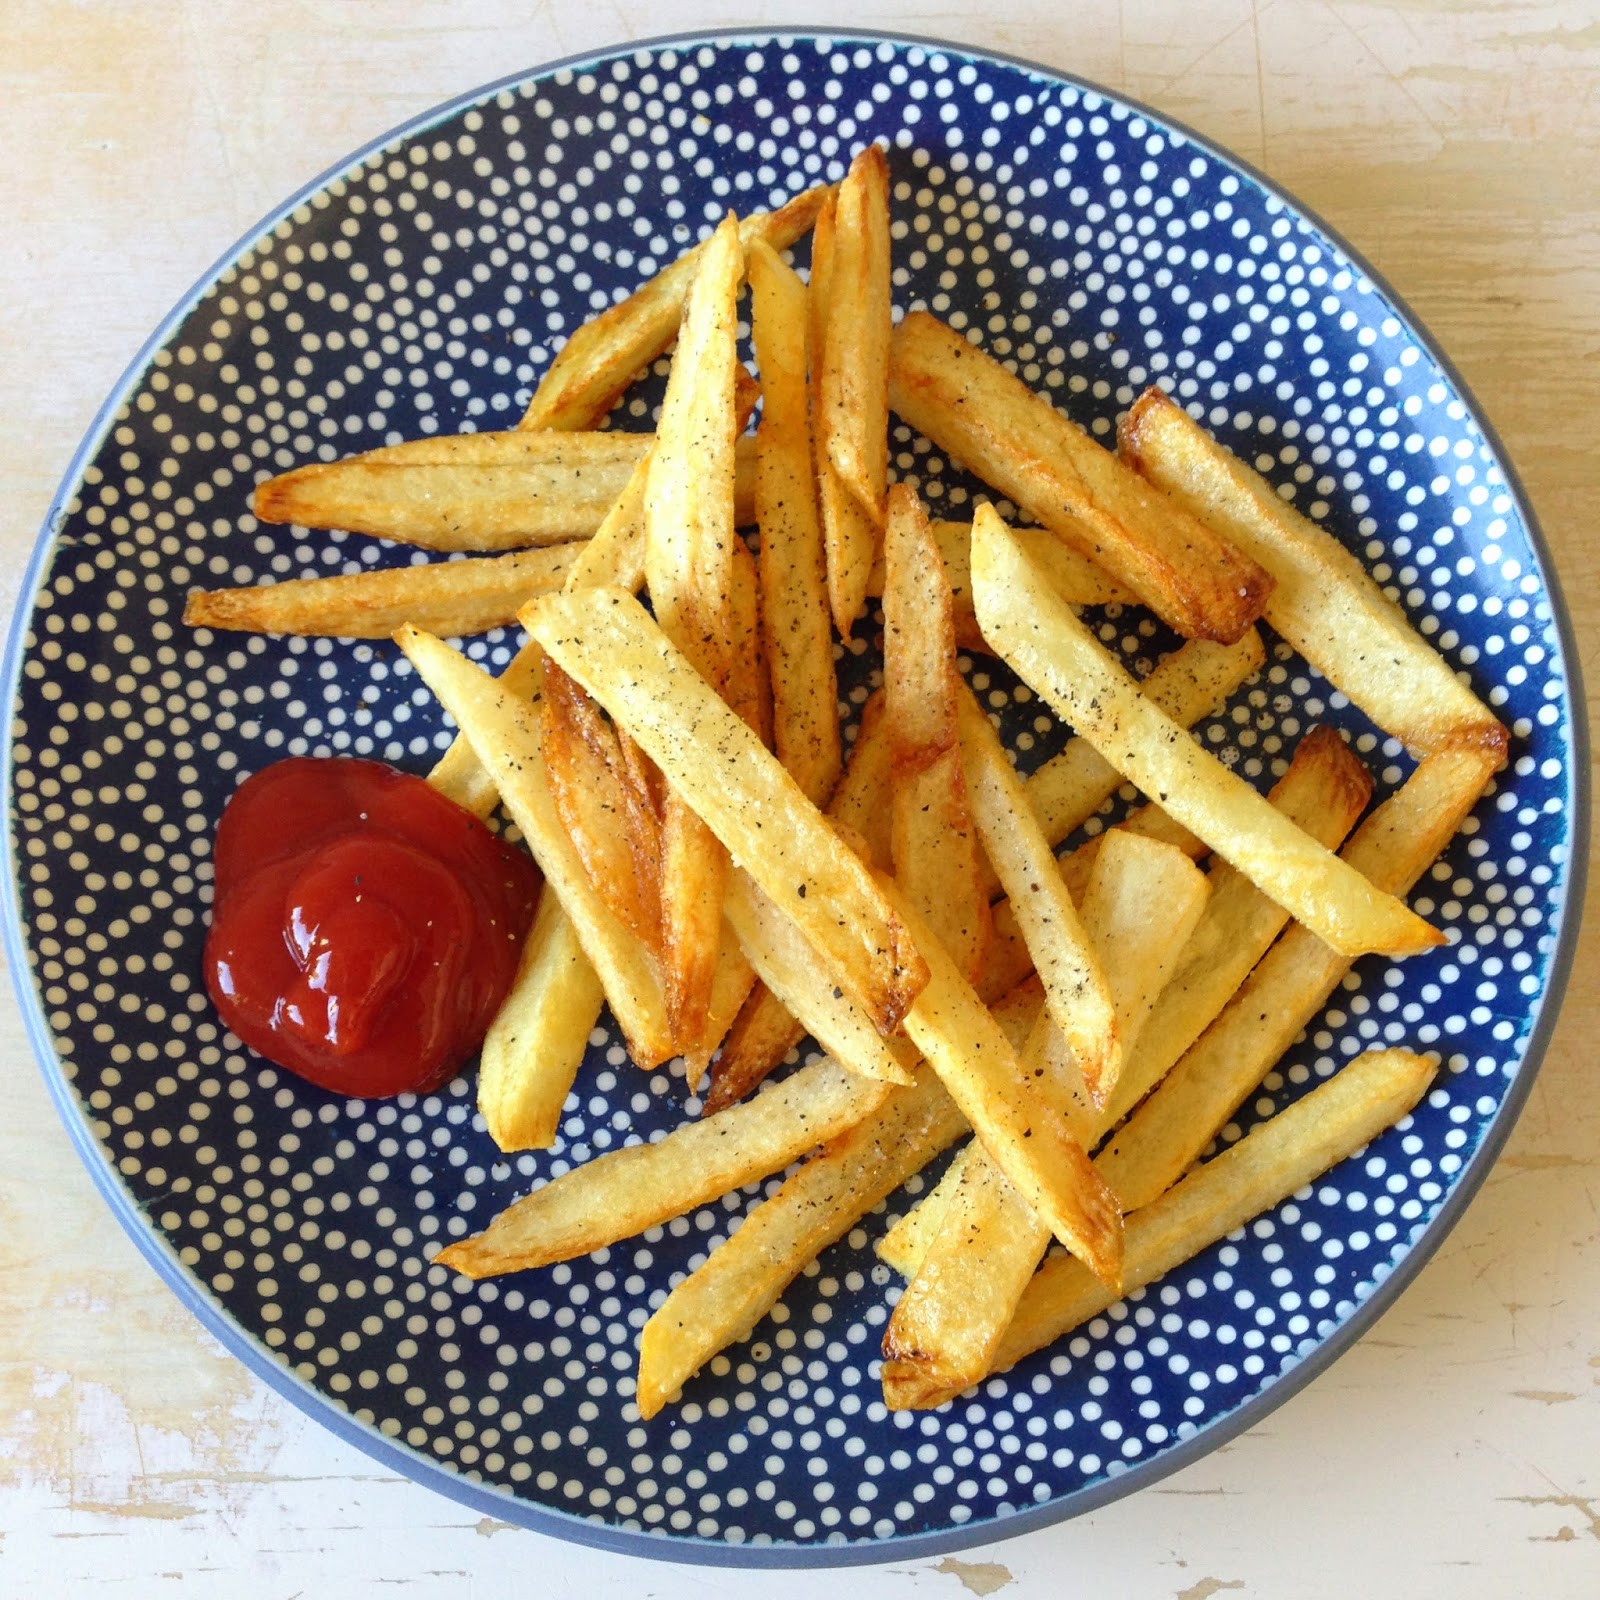
So these may not be the best for you, but they are delicious. You can cut your potatoes into cubes or whatever works for you. My kids beg me to cut them into fry shapes, so I do my best. We like ours with just salt and pepper, but you can get as adventurous as you want with sauces and seasonings.
All you need:
Potatoes (we used 12 for a family of 6)
Pure Canola Oil (fill your pan so that there is a 1/2 of an inch of oil in the pan
Salt and Pepper to taste
Cut your potatoes into cubes or fry shapes. Too big and they take too long to cook, too small and they get very dry. Whether they are cubes or sticked I shoot for about 1/2 an inch wide.
Start by heating your oil up. I fry my potatoes on just above medium heat. It is important to get the oil sufficiently hot otherwise you will end up with really greasy potatoes. If it isn't hot enough the potatoes will absorb the oil all the way through and you will end up with a greasy mushy mess! When the oil is sufficiently hot it crisps the exterior and keeps the fries from absorbing to much of the grease. It should bubble and pop when you put the potatoes in the oil. If not, you haven't got your oil hot enough.
Once your oil has heated up, give it about 5 min, place your potatoes in the oil. You don't want any over crowding, so put a modest amount in. Overcrowding also ends up in mushy potatoes that don't have a crispy exterior. Turn them every minute or so until they are a golden delicious brown. You will find that your first batch takes a bit longer than the subsequent batches.
When your home fries have reached a golden brown complexion use a slotted tool to remove them onto a plate with a couple of napkins to absorb the excess grease.
Salt and pepper to taste. Serve immidiatley with your favorite sauces.
Truly Scrumptious!
Truly Scrumptious, These rolls are Truly Scrumptious!
When I was 13 we had a lady in our ward who taught early morning seminary in her home. She used to make cinnamon rolls on Fridays for all the kids. Her cinnamon rolls were legendary. I never got to go to her seminary class because they changed teachers the year I turned 14. I felt totally gypped! But I did get to have her cinnamon rolls once at a Christmas party. My whole adult life I have been trying to replicate those legendary cinnamon rolls. After lots of experimenting I have finally found a recipe that I think measures up! Anything less was an utter disappointment! Here it goes.
Ingredients
Dough:
2 1/4-ounce package yeast
1 cup warm water
1 cup scalded milk
1/2 cup sugar
1/3 cup butter
1/3 cup shortening
2 teaspoons salt
2 eggs
7 cups all-purpose flour
Filling:
1 cup melted butter, plus more for pan
1 1/2 cup sugar, plus more for pan
4 tablespoons ground cinnamon
Frosting:
1 1/2 stick of melted butter
1 package of cream cheese
1 tsp vanilla
1 tsp almond extract
3-4 Tbs of cream or half and half (add until you have the consistency you want)
7 cups powdered sugar
Directions
Heat oven to 350 degrees F.
In a small bowl, dissolve yeast in warm water and set aside. In a large bowl mix milk, sugar, melted butter, shortening, salt and egg. Add 2 cups of flour and mix until smooth. Add yeast mixture. Mix in remaining flour until dough is easy to handle. Knead dough on lightly floured surface for 5 to 10 minutes. Place in well-greased bowl, cover and let rise until doubled in size, usually 1 to 1 1/2 hours.
Coat the bottom of baking pans with butter and sprinkle with sugar.
When doubled in size, punch down dough. Roll out on a floured surface into a 30 by 9-inch rectangle. Mix sugar and cinnamon. I like to sprinkle a little bit of my cinnamon and sugar mixture around the edges of the dough to keep the butter from spilling off. Spread melted butter all over dough and sprinkle the rest of the cinnamon and sugar over the buttered dough. Role hotdog style and pinch edges together to seal. Cut into 1 1/2 inch slices.
Place cinnamon roll slices close together in the pan and let rise until the dough is doubled, about 45 minutes. Bake for about 30 minutes or until golden brown.
Mix the melted butter, cream cheese, vanilla, and almond extract together until smooth. Add in the powdered sugar and mix until well incorporated. Add Cream or half and half until the frosting is the desired consistency. I like mine to be a little drippy.
Frost Cinnamon rolls as soon as the come out of the oven allowing the frosting to melt and drip all over the cinnamon rolls.
Enjoy. I know you will!
When I was 13 we had a lady in our ward who taught early morning seminary in her home. She used to make cinnamon rolls on Fridays for all the kids. Her cinnamon rolls were legendary. I never got to go to her seminary class because they changed teachers the year I turned 14. I felt totally gypped! But I did get to have her cinnamon rolls once at a Christmas party. My whole adult life I have been trying to replicate those legendary cinnamon rolls. After lots of experimenting I have finally found a recipe that I think measures up! Anything less was an utter disappointment! Here it goes.
Ingredients
Dough:
2 1/4-ounce package yeast
1 cup warm water
1 cup scalded milk
1/2 cup sugar
1/3 cup butter
1/3 cup shortening
2 teaspoons salt
2 eggs
7 cups all-purpose flour
Filling:
1 cup melted butter, plus more for pan
1 1/2 cup sugar, plus more for pan
4 tablespoons ground cinnamon
Frosting:
1 1/2 stick of melted butter
1 package of cream cheese
1 tsp vanilla
1 tsp almond extract
3-4 Tbs of cream or half and half (add until you have the consistency you want)
7 cups powdered sugar
Directions
Heat oven to 350 degrees F.
In a small bowl, dissolve yeast in warm water and set aside. In a large bowl mix milk, sugar, melted butter, shortening, salt and egg. Add 2 cups of flour and mix until smooth. Add yeast mixture. Mix in remaining flour until dough is easy to handle. Knead dough on lightly floured surface for 5 to 10 minutes. Place in well-greased bowl, cover and let rise until doubled in size, usually 1 to 1 1/2 hours.
Coat the bottom of baking pans with butter and sprinkle with sugar.
When doubled in size, punch down dough. Roll out on a floured surface into a 30 by 9-inch rectangle. Mix sugar and cinnamon. I like to sprinkle a little bit of my cinnamon and sugar mixture around the edges of the dough to keep the butter from spilling off. Spread melted butter all over dough and sprinkle the rest of the cinnamon and sugar over the buttered dough. Role hotdog style and pinch edges together to seal. Cut into 1 1/2 inch slices.
Place cinnamon roll slices close together in the pan and let rise until the dough is doubled, about 45 minutes. Bake for about 30 minutes or until golden brown.
Mix the melted butter, cream cheese, vanilla, and almond extract together until smooth. Add in the powdered sugar and mix until well incorporated. Add Cream or half and half until the frosting is the desired consistency. I like mine to be a little drippy.
Frost Cinnamon rolls as soon as the come out of the oven allowing the frosting to melt and drip all over the cinnamon rolls.
Enjoy. I know you will!
Thursday, October 16, 2014
Ravioli Soup
I'd never tried ravioli soup until just this last year, it's now one of my favorites!
Ingredients:
3 TBS butter
1/2 a large onion
1 shallot
1 stalk of chopped celery
1 chopped red bell pepper
1 zucchini chopped
2 cloves of minced garlic
1/4 tsp crushed red pepper flakes
2 28 ounce cans of crushed tomatoes
3 cups of vegetable stock
1 Cup of hot water
chopped fresh basil
1 tsp of oregano flakes
1 Cup of cream
24 ounces of frozen raviolis
Salt and pepper to taste
1. Saute your onions and shallot in the butter until they are yellow and translucent.
2. Add in celery, bell pepper, zucchini, and garlic and toss for two minutes.
3. Add in tomatoes, stock, water, pepper flakes, basil, and oregano.
4. Simmer for 1 hour and then blend on high for 2 min. Place soup base back into the pot.
5. Cook the raviolis according to manufacturer's instructions separately just before serving.
6. Add the cream to the tomato base, stir in completely and add in the raviolis.
7. Salt and pepper to taste.
8. Serve and garnish with a bit of chopped basil.
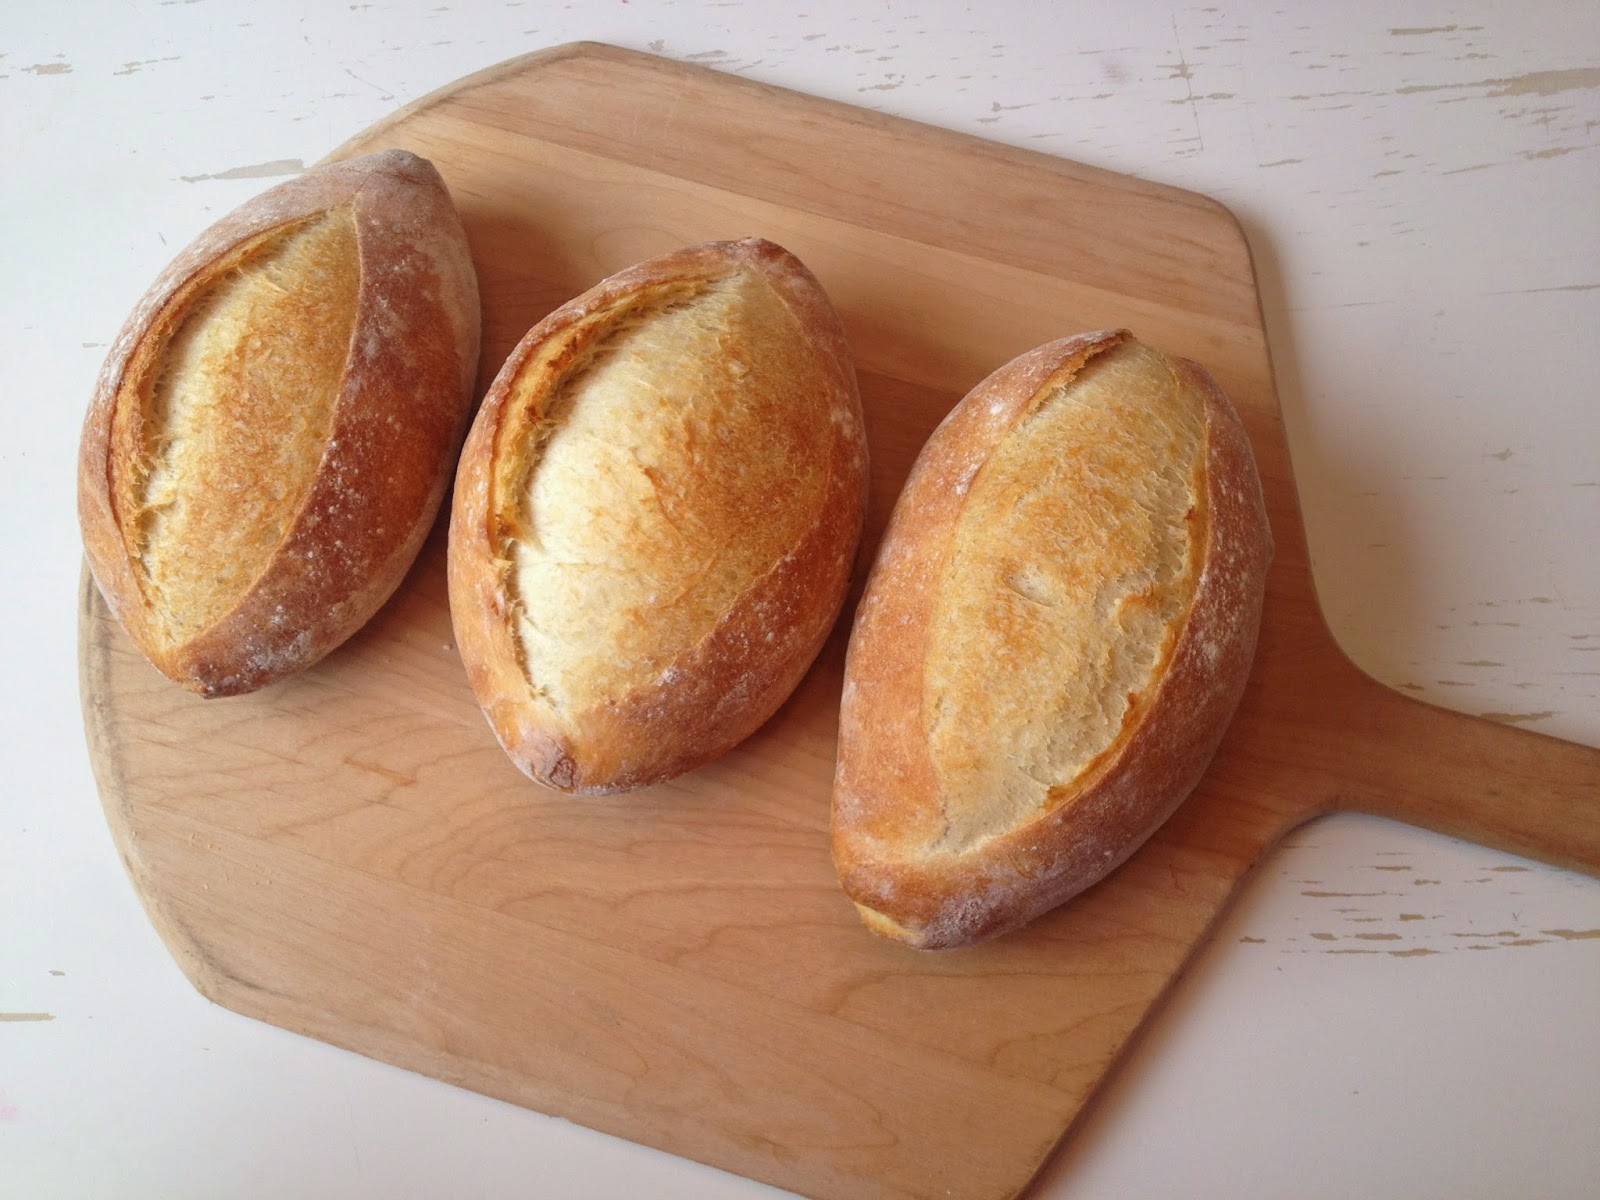
This soup is great with a crusty loaf of bread to sop up the tomato base. This is the best bread ever! Click here for a great tutorial!
Monday, October 13, 2014
Panna Cotta
This is a delicious fail proof recipe for an Italian Heavy Cream Custard, Panna Cotta
Ingredients:
3/4 Cup confectioner's sugar
2 Cups heavy cream
1 Cup whole milk
1 1/4-ounce envelope gelatin plus 1 tsp
1. Put the sugar, cream, and milk in a saucepan, turn the heat on to medium high, and stir steadily.
2. Remove the pan from heat just as its contents begin to bubble, but before they boil. While stirring, drizzle in all the gelatin. Continue to stir for 5 minutes, then empty the pan into a bowl. Stir occasionally while the mixture cools.
3. When cold, pour the mixture through a fine sieve into the ramekins and place them in the refrigerator for at least 8 hours, or even better, overnight.
4. When ready to serve, bring water to a simmer in a small skillet. Loosen the custard from the sides of the ramekin using a knife blade. Put the ramekin bottom down in the skillet for 1 or 2 seconds, then turn it over onto an individual serving plate, shake to unmold the custard, and serve with your favorite berries.
Oh WOW!
Oh Wow! This really is the best Banana Bread ever! Just look at the way the sugar crystallized on the "crust" This recipe is a function of a little guesswork, and not quite having all of the right ingredients. It makes 1 regular sized loaf of banana bread. If you want to double the recipe use 3 eggs instead of 4
Ingredients:
2 TBS sugar
1/2 tsp cinnamon
6 TBS butter at room temperature
1 1/2 C white sugar
2 eggs
3 very ripe bananas
3/4 cup sour cream
1/4 cup buttermilk
1 tsp vanilla extract
1/2 tsp almond extract
1/4 tsp ground cinnamon
1/4 tsp salt
1 1/2 tsp baking soda
2 1/4 cups all-purpose flour
1. Preheat the oven to 300 degrees.
2. Mix 2 TBS sugar with 1/2 tsp cinnamon. Grease your loaf pan with butter and sprinkle with the cinnamon and sugar mixture.
3. Mash bananas with a fork and beat with butter, sugar, and eggs for 1 min on medium speed.
4. Add in sour cream, buttermilk, extracts, cinnamon, salt, and baking soda. Beat at medium for 2 minutes.
5. Mix in flour until fully encorporated. Scrape down the sides and mix again.
6. Fill your loaf pan 2/3 full.
6. Bake for 1 hr and 25 min to an hour and 30 min, or until it is a golden brown and a toothpick fully inserted comes out clean.
I was able to get 1 large loaf and one mini loaf out of the batter, although I only cooked the mini loaf for 55 min.
I wrapped each loaf with plastic wrap and then added some ribbon and tags.
Friday, September 12, 2014
DIY Wooden Cake Stands
Mikel-ann and I had so much fun doing the color run! it was definitely the right run for us, no pressure, just a whole lot of color, bubbles, music, and fun. After the run we had to walk back to our car which was just past the farmers market. On the way through we stumbled onto this wonderful table full of wooden painted cake plates, they were so fun to look at and I'm kind of a cake plate freak. I collect them. I really wanted to buy one, but decided it would be so much more fun to make one... or three!
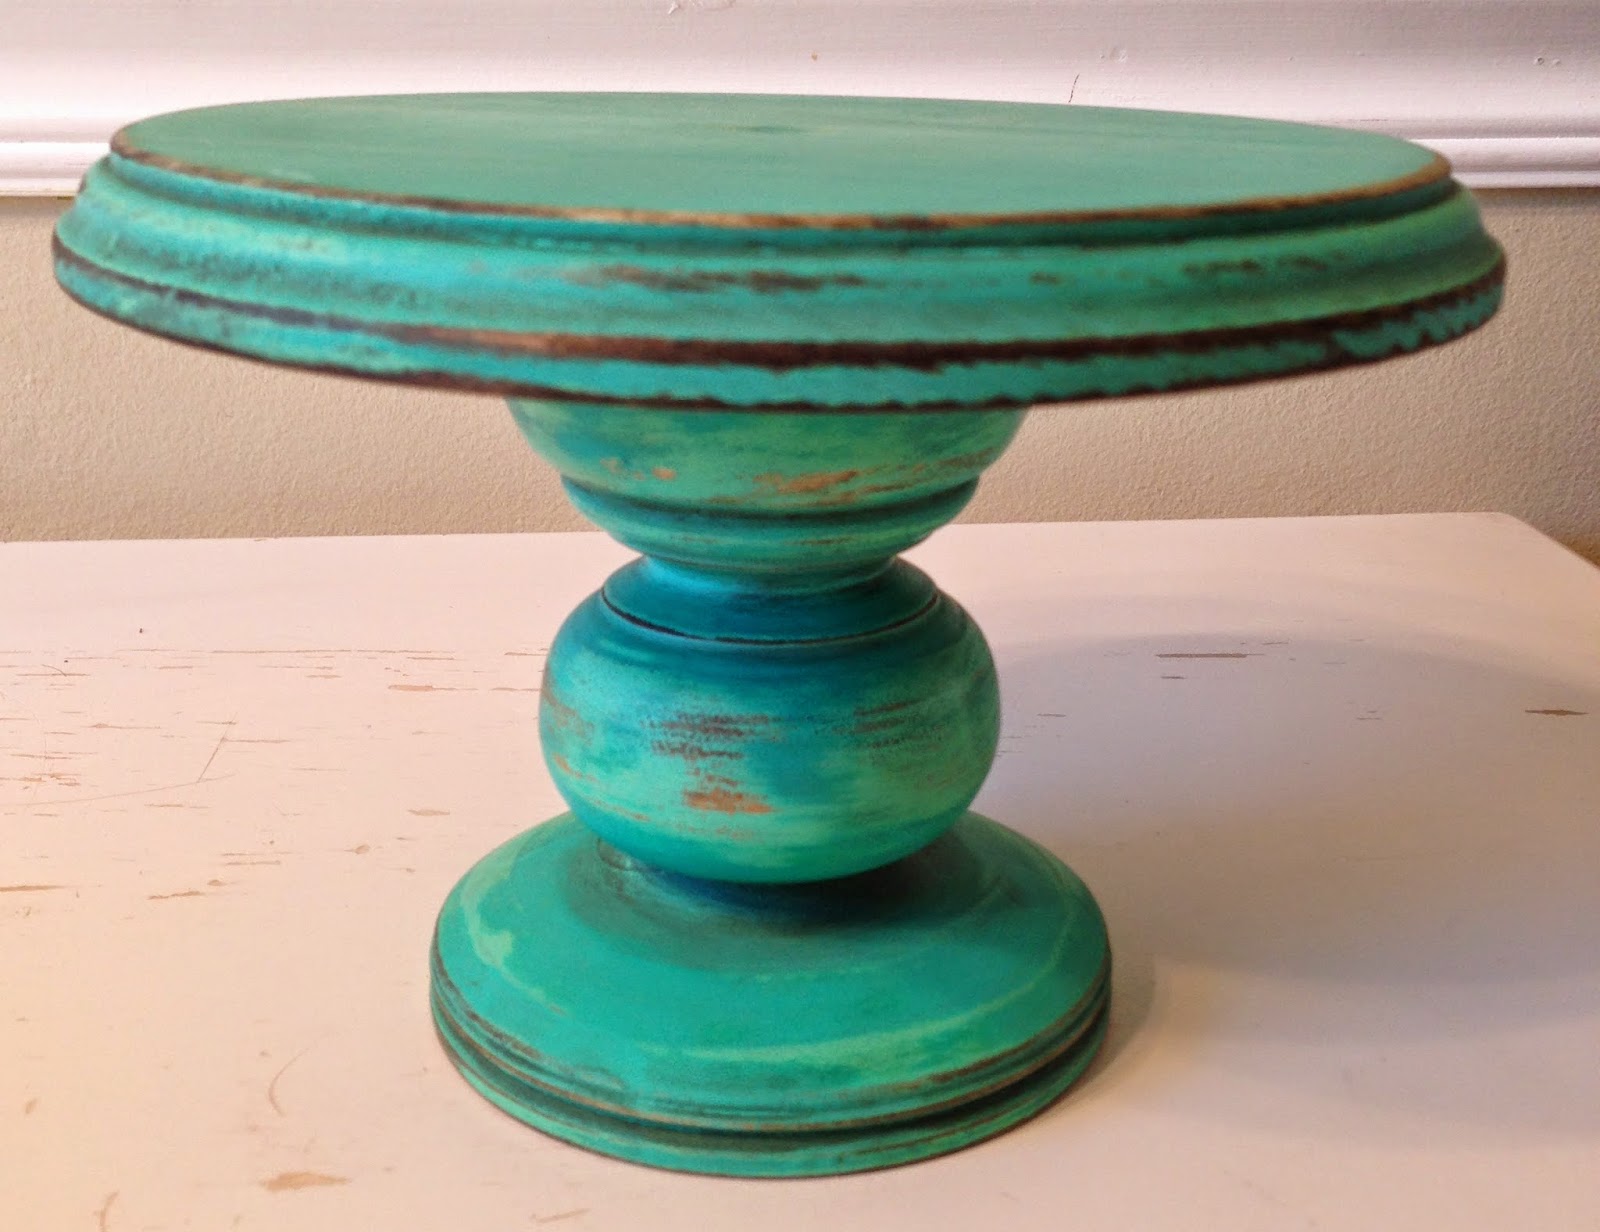
Here's how my first one turned out. At the booth he had both cake stands and cupcake stands. I thought how fun it would be to put a special birthday cupcake on a special plate, so this is actually a cupcake cake stand. I really love it! I also made a full sized cake stand and a mini cake cake stand.
The process was pretty simple and required just a few supplies.
Materials:
Unfinished wooden base
Unfinished wooden table leg
Unfinished wooden round
Screw(s)
Wood fill
Sanding blocks (medium and fine)
Wood glue
Paint suitable for wood
Wood stain
I was able to get all of these supplies between Lowe's Hardware and Michael's Craft stores.
1. Sand all of your wooden components until they are no longer rough and very smooth to the touch. Start with the medium grit sanding block and then move on to the fine sanding block. Wipe dust away with a damp cloth.
2. I found it easiest to do my first coat of paint on the individual pieces before they were connected. You will actually want to do two coats of paint leaving a few minutes in between each coat of paint. The paint dries rather quickly. I used the 50 cent acrylic paint from Walmart. I also blended two to three colors to get the desired shade.
3. After your paint has dried, give it a day or two, sand it down and rough up the edges a bit. Wipe the dust away with a damp cloth.
4. Now it is time to connect all of your pieces. Here's what worked best for me. I found the glue and the wood filler at Lowe's.
Start by marking your centers and either gluing or screwing and gluing your pieces together. The glue works rather quickly, and per usual less is more with Elmer's. Wipe any excess glue away immediately with a cloth. Give The glue a day to dry.
5. Use the wood fill according to directions if needed. I had a hard time finding rounds without holes in the middle. The day I went to Michael's their wooden section was pretty wiped out, 2 of the 3 round pieces I found were intended for clock making and so had holes in the centers. I filled them with the wood fill, sanded and repainted.
6. Do a second coat of paint, well actually 2 a few minutes apart, so a total of 4. You can alter the shade a bit so as to make the 1st shade peak through a bit after you have done your final sanding.
7. Give your last coat of paint a day to dry and then sand it down until it is very smooth and bits of the wood are peeking through.
8. After you have sanded your cake plate for a final time wipe away the dust with a damp rag and do a top stain over the paint and the wood. I used both a natural and a dark stain, but I think I prefer the dark stain best.
Tada! I used the natural stain on the green cake stand and the dark stain on the turquoise cake stand.
Hope you enjoy!
Sunday, September 7, 2014
Bubblegum Ball Bead Necklaces.
This is my adorable 6 year old Livy, you just gotta love that smile! My sister sells these incredible bubblegum ball necklaces through her Etsy shop EyeCandyonEtsy. The flowers are detachable. I just love them! I want one to match each of her outfits! They come in a range of prices and colors.
Here is another one that I fell in love with!
Here's a quick snap we took before school this morning! She loves the rainbow colors, but not too fond of the sun in her eyes.
She just added a bunch of faux pearl necklaces. These are my new favorites! They come in all kinds of colors.
And another one in her favorite color, PURPLE!
I love this coral cutie! Livy however is not too thrilled about taking another pic!
Click here to visit her Etsy shop EyeCandyonEtsy
Saturday, August 2, 2014
At Last!
This last week was the open house for the Ogden Temple! It has been a long time coming. Chad has been part of the process for the last 4 years. It was so wonderful to go and see some of the work he and others have done to make the Ogden Temple so beautiful! He has been so grateful for his job, this opportunity, and for the people he is privileged to work for. The Ogden Temple is kind of special to me. My parents were married there, I used to go and do baptisms for the dead every Friday at the crack of dawn before classes while at Weber, and now Chad has had the privilege of helping with the redesign. Our family is kind of hopeless at family photos, but here's us at the open house.
We weren't aloud to take any pictures on the inside, but here are some of the church published pictures. This is what the Ogden Temple used to look like.
Here's what the remodeled temple looks like.
I really like the Angel Moroni and the architectural details.
My favorite part was the decorative paint and the chandeliers.
I also loved the use of the Pioneer rose and the prairie grass throughout.
What a beautiful day, and a wonderful opportunity!
We weren't aloud to take any pictures on the inside, but here are some of the church published pictures. This is what the Ogden Temple used to look like.
Here's what the remodeled temple looks like.
I really like the Angel Moroni and the architectural details.
My favorite part was the decorative paint and the chandeliers.
I also loved the use of the Pioneer rose and the prairie grass throughout.
What a beautiful day, and a wonderful opportunity!
Perfectly Chocolate Chocolate Truffles
These are the most perfectly chocolate chocolate truffles! The balance between the dark and the milk chocolate is delicious. They can even compete with the fine chocolates I love to get at the chocolate store, and they are much cheaper to make! Buying a quality chocolate and good butter and good cream is the most important step. I love Ghirardelli and guittard chocolate, but for sure look for a chocolate that uses real vanilla and not vanillin.
Ingredients:
1 1/3 cup of semisweet chocolate chips
2/3 cup of milk chocolate chips
1/3 cup of cream
6 Tablespoons of butter
Opt: Cocoa powder, sea salt, almonds, etc. to use as a covering.
Heat the butter to a simmer and add in the the butter. Once the butter has melted add in the chocolate stirring until everything is smooth and completely melted. Remove the chocolate from the heat and place in a shallow container to cool. After the chocolate has cooled to room temperature cover and refrigerate for 2 hours. Using a 1 inch melon baller, or a spoon, roll the chocolate into circular balls and roll in your desired toppings. Eat immediately or keep in an air tight container for a couple of days. They are best when fresh!
I like to buy small boxes and use mini cupcake liners when giving my chocolates away, but most of all I like to eat them :-)
Subscribe to:
Posts (Atom)