Wednesday, May 28, 2014

Dutch Oven Corn Bread


With all the commotion for this activity I just wanted to go simple with the corn bread. I bought Jiffy mix corn bread for about 50 cents and had the girls use two boxes per dutch oven.

The first step was building a charcoal pyramid.


They have to burn like this for 20 min before they are ready to cook with. So the YCLs showed up a little early and got started on that right away. We used a little tin foil to protect the concrete from being scorched.  We used about 44 charcoals for each dutch oven. I also opted to buy the kind that don't require starter fluid.

After they heated up for 20 min we spread them out and put half of the charcoals on top of the dutch oven lids and the other half under the pots.


 Best tip ever: The girls mixed the batter up in bowls and then put them in the disposable pans to bake inside the dutch ovens to make clean up super easy! I love it! No scrubbing dutch ovens!


We let it bake for 28 min, but I think we could have stopped at 22 min.  Et Voila!


Job well done girls!

Tuesday, May 27, 2014

Chili Off


The next activity we are going to have to get ready for girls camp is a chili off! I thought it would be a fun way to knock out a few of our food related certifications. The girls love a good competition too! We used a fire pit (S'mores), camp stoves (chili), and dutch ovens (corn bread).
We are going to divide the girls up into 3 teams of 9 and let the girls compete for the best chili. The judges will be the leader's families. We will provide them with a set of ingredients and let them decide on amounts and whether or not to include a particular ingredient, how fine to chop it, etc.

Here's a list of ingredients we'll be including:

3 lbs of ground beef (1lb of ground beef per team)
3 onions
3 cans of kidney beans
3 cans of diced tomatoes
3 bell peppers
3 cans of pinto beans
3 cans of tomato sauce
garlic
cayenne pepper
chili powder
ground cumin
salt and pepper
shredded cheese
sour cream


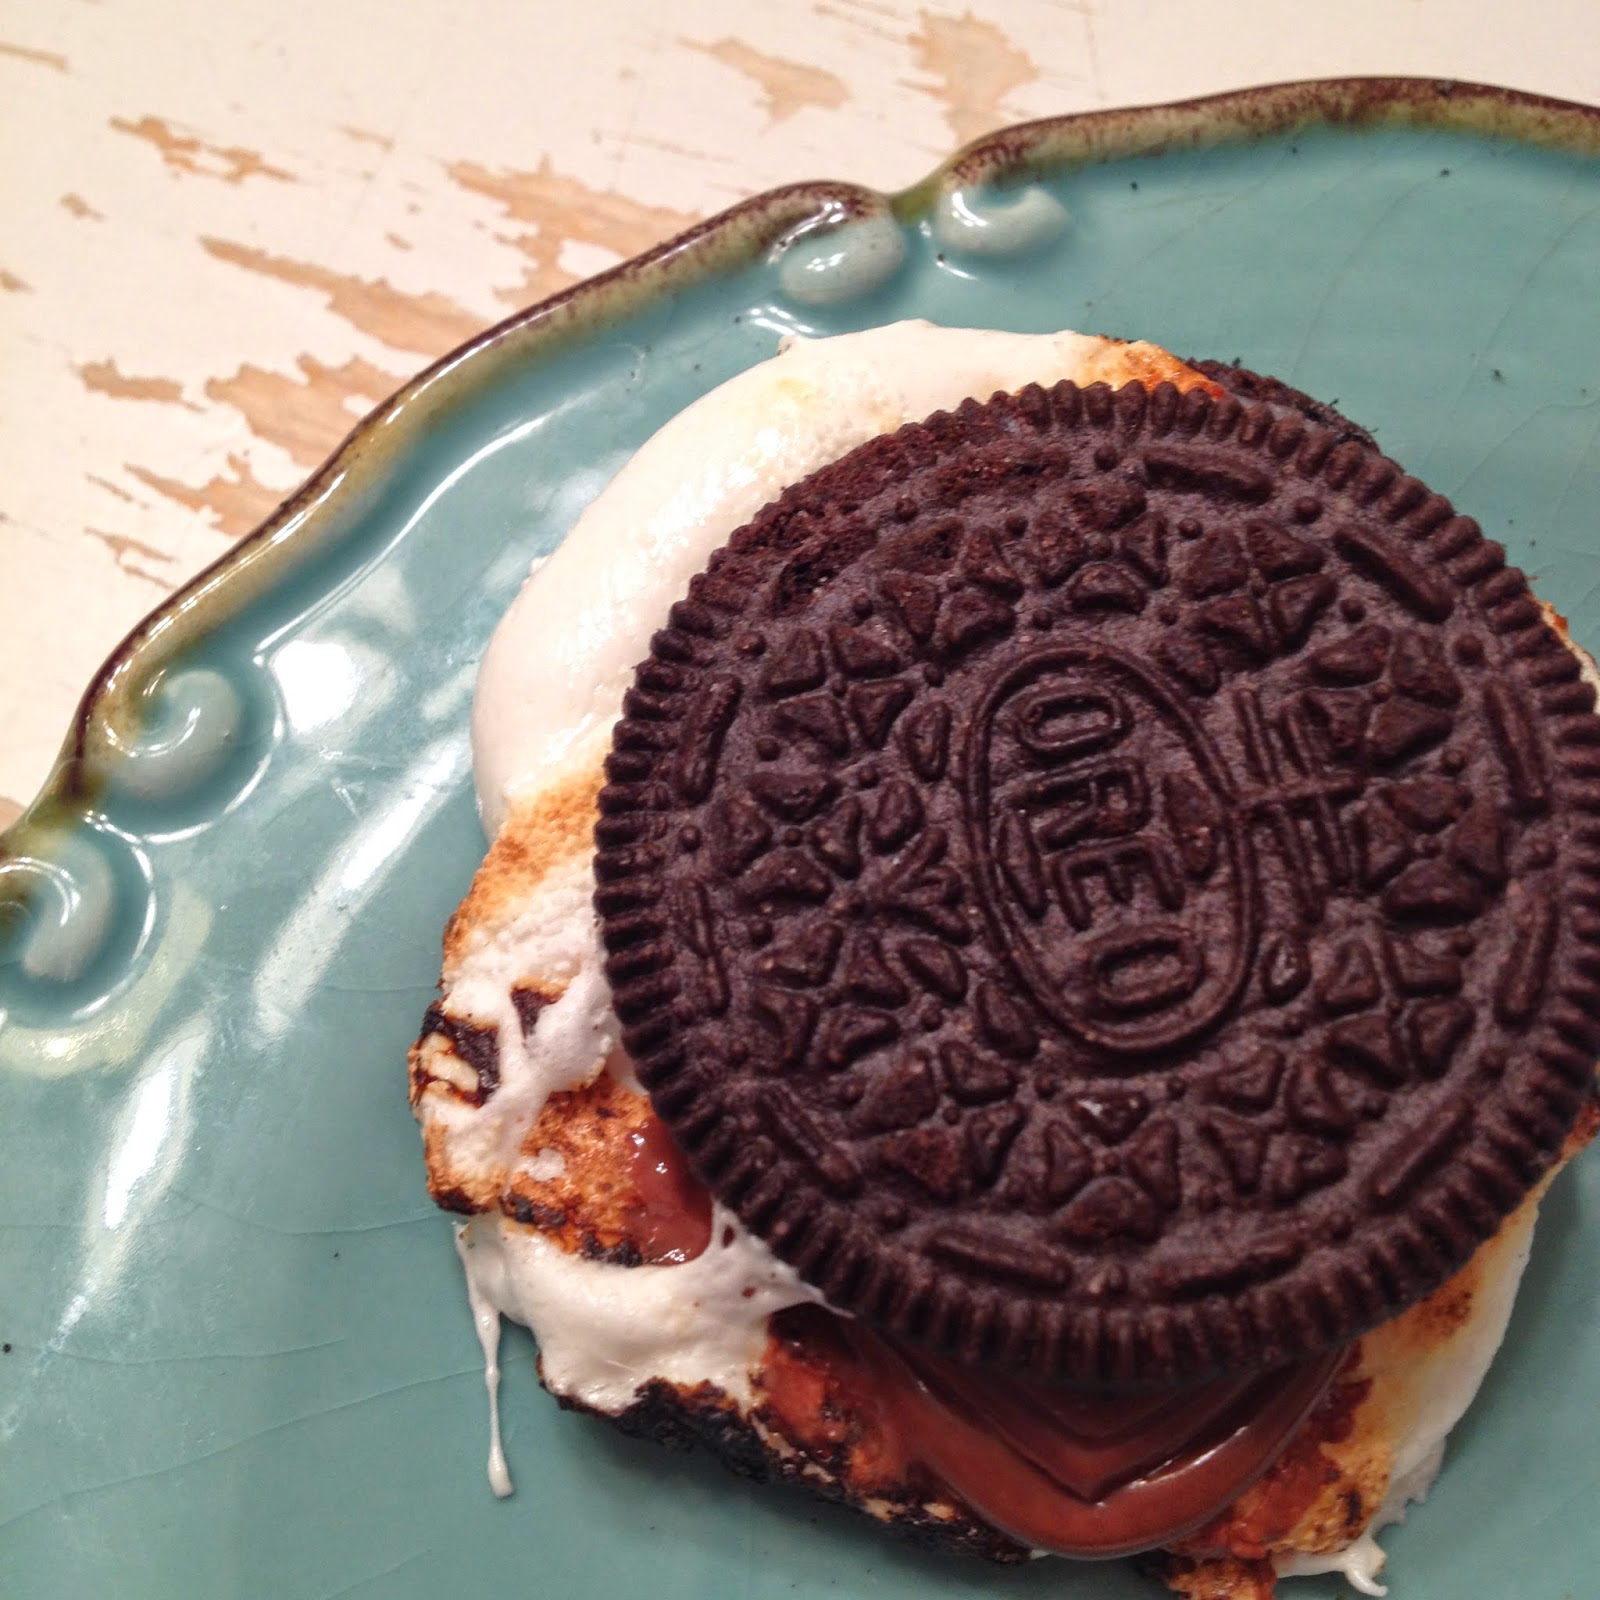
We will also be serving corn bread, lemonade and water, and Oreo S'mores :) Click here for the recipe. I am going to print off a few voting cards and let the leader's families be the judges. I think it will be way fun.

http://bumbledo.blogspot.com/2014/04/oreo-smores.html

I thought these would make for cute decorations at the serving table.


I found the chalk board tags for 49 cents at Michael's. Awesome, right?


I fell in love with the tomato can vases!


Mr. Piggy seems like a good friend to bring along too :-)!
I'll post more pics and how tos for the chili and corn bread, but I think we're off to a great start! I think it's going to be a really fun activity!

Here's a few more pics!

The Girls Chopped their veggies and put the ingredients in their pots.


Then each team cooked their chili on our camp stove.


Somebody gets a hold of my camera:-) I love these girls!


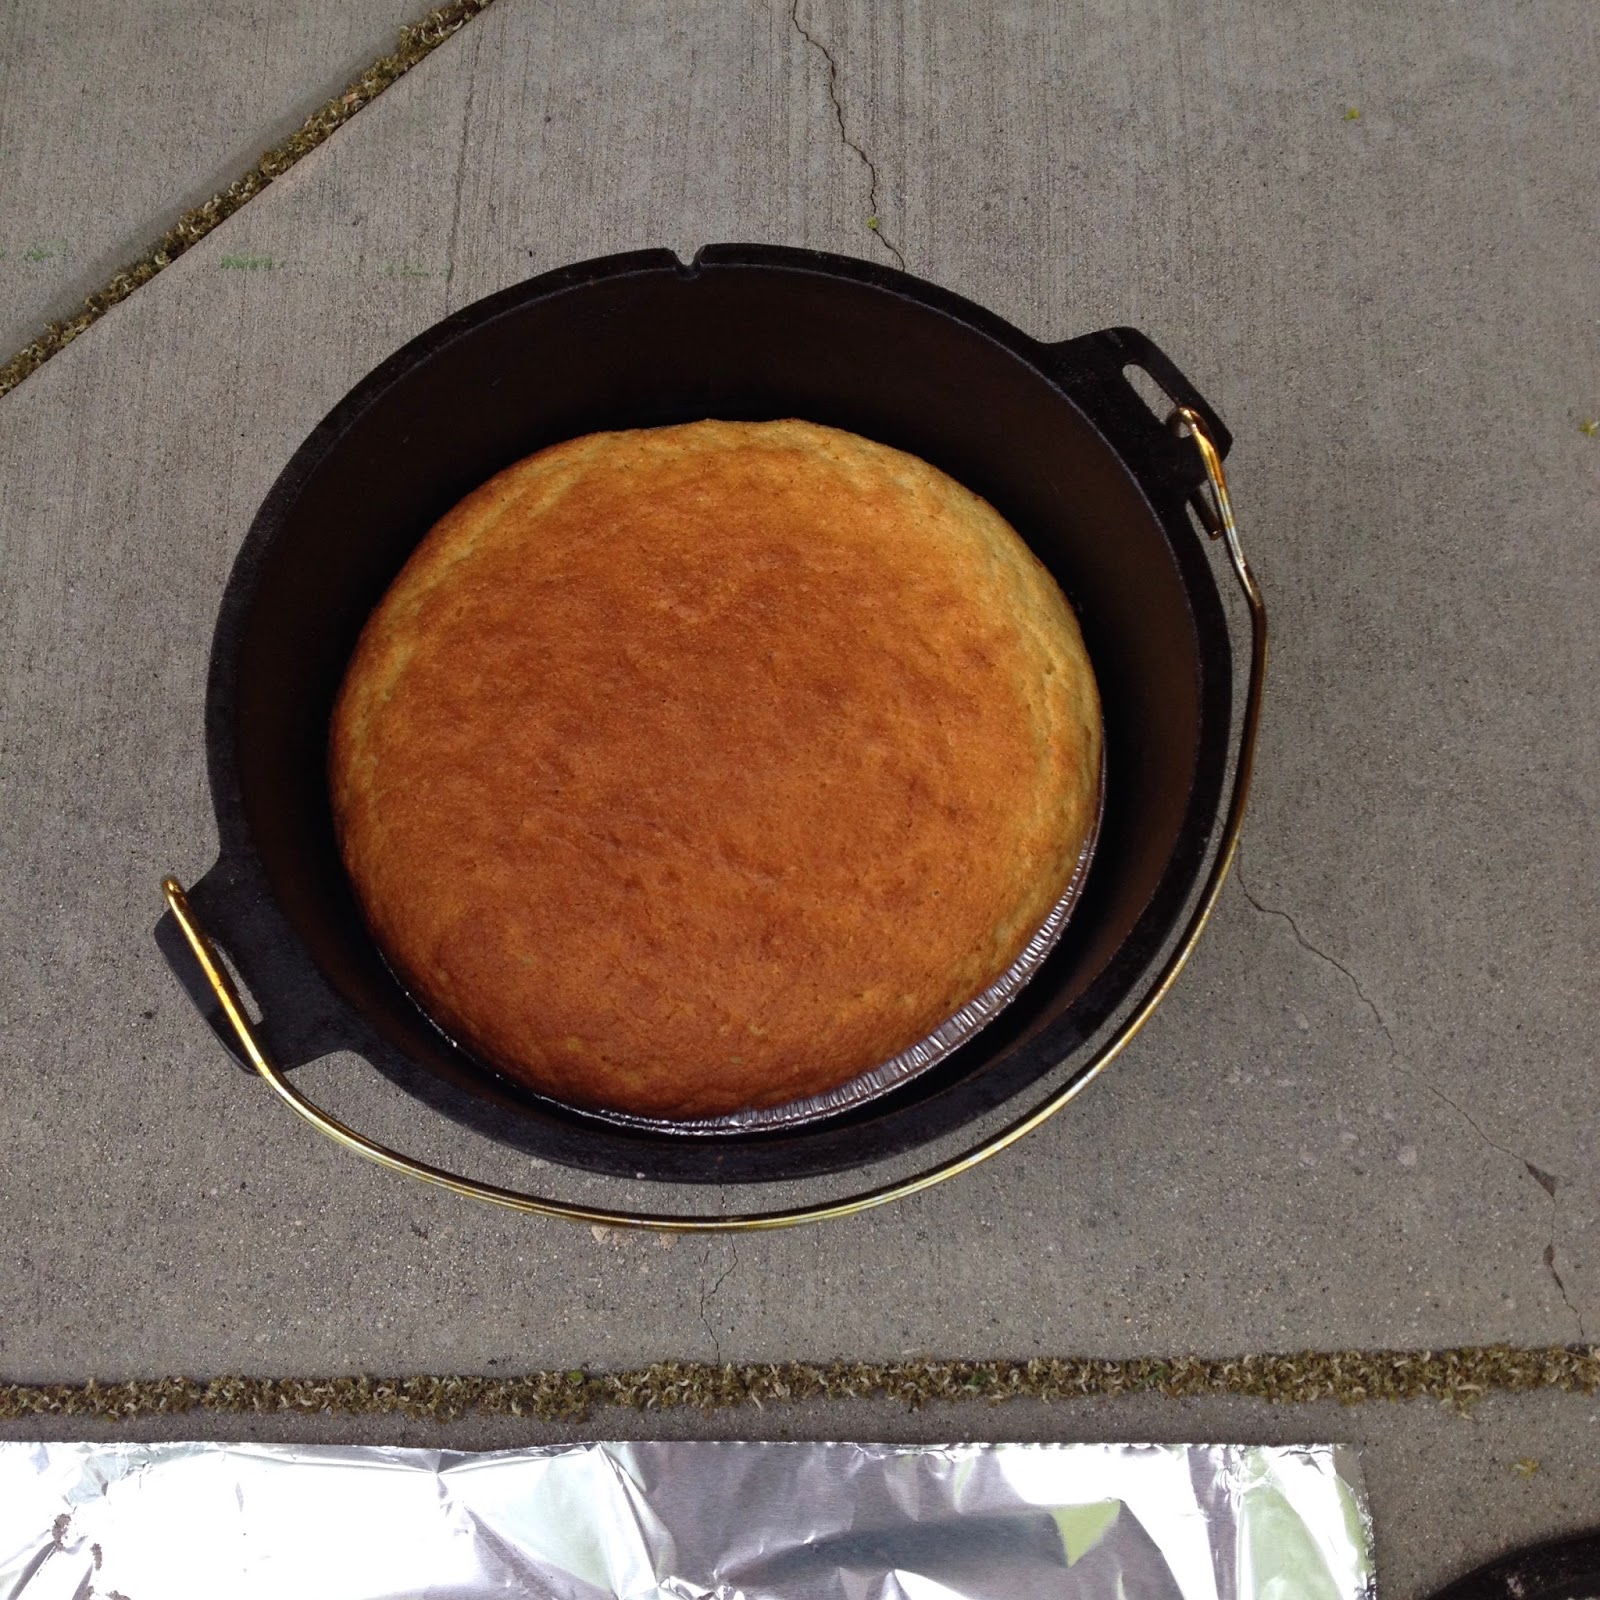
For a small tutorial on Dutch Oven Corn Bread click here.

http://bumbledo.blogspot.com/2014/05/dutch-oven-corn-bread.html

http://bumbledo.blogspot.com/2014/05/dutch-oven-corn-bread.html

After we were all through we invited the leaders' families and the bishopric to be our judges!


Our chili tasting cups


Somebody enjoys a little Sm'Oreo as one of my YW coined it.


This has been one of my favorite pre-camp activities, I really enjoyed it.
GREAT JOB GIRLS!


Playing Hooky

Today Livy and I decided to play hooky! It was so beautiful outside. We decided to go on a hike. I gotta say I just love hiking, everything about it! I love the smells, the sound of the dry earth under my feet, the birds, the flowers, the views. We had so much fun!

We find a missing jacket stick figure! How cute!


We make some bouquets of wild flowers!


Do not pass me up MOM!


I'm the leader!


We take a break, have a picnic, and pic some more wild flowers.


Livy spots a butterfly and admires the gold flecks in the dirt.


These smelt incredible!


It could not have been more beautiful!


What a great day!


Monday, May 26, 2014

Mini Chocolate Tartlets

YUMMY!


This is a fool proof recipe that always turns out!
 Makes 24 tartlets

The Crust:

6 TBLS Cocoa
1 1/2 Cups of Cake Flower
1 Pinch of Salt
 6 TBSP Sugar
12 TBSP Butter


Preheat the oven to 375 degrees. To make the crust start by sifting all of the dry ingredients together. Cut your butter up into 16 pieces. Use a food processor or a pastry cutter to mix your crust until it starts to form into a clump. Roll the dough on a lightly floured work surface until it is about 1/8 of an inch thick. Use a biscuit cutter or cookie cutter to form rounds just big enough to fit inside a lined cupcake tin. Prick the rounds with a fork and bake for 14 minutes.

The Chocolate Filling:

21 Ounces of Semisweet Chocolate Chips
1 1/2 Cups of Heavy Cream
72 Raspberries

To make the Filling heat the cream to a simmer, add chocolate chips and remove from the heat. Stir until smooth. Use a medium sized cookie scoop to fill all of the baked crusts with chocolate.


Refrigerate for a couple of hours before adding 3 raspberries to each tartlet.


Use a mesh sieve to sprinkle a bit of powdered sugar over the berries.


Hope you enjoy!

For how to make a Washi Tape Banner click here.


6 tablespoons Ghirardelli Unsweetened Cocoa
12 tablespoons unsalted butter (1 1/2 sticks)
6 tablespoons sugar
1 1/2 cups cake flour
Read more at http://www.ghirardelli.com/recipes-tips/recipes/chocolate-raspberry-tartlets#h6slgSazIDYzsqR3.99
6 tablespoons Ghirardelli Unsweetened Cocoa
12 tablespoons unsalted butter (1 1/2 sticks)
6 tablespoons sugar
1 1/2 cups cake flour
Read more at http://www.ghirardelli.com/recipes-tips/recipes/chocolate-raspberry-tartlets#h6slgSazIDYzsqR3.99

Washi Tape Cake Banner


This project is so simple and takes less than 10 minutes!

Here's what you need:

Washi Tape in as many patterns and colors and you choose
Baker's Twine to match
Striped Straws
Scissors
Ruler


I found all of my supplies at Michael's

Here's what to do:

1. start by cutting 3 inch strips from your washi tape


2. Next lay your string out, carefully slide a piece of the washi tape centered under the string.


Carefully fold it down on top of eachother


Next trim the washi tape to an inch and a half and clip the ends to create the bottom of the banner. To get a nice even look fold the washi tape in half and cut a diagonal line from the center of the fold to the opposite bottom corners.


Open it up, smooth it out, and repeat until the banner is the desired size, making sure to space the "banners" out evenly.

3. Once you are finished with your flags it is time to attach them to the straws. You can tie a knot and leave a tail, or you can cut the tail and use another piece of twine to make a bow around your straw.


For Mini Chocolate Tartlets click here